A blog by a veteran math teacher who tries to learn new things. Most posts are about teaching math and problem-solving, but sometimes, it's just about life.
I've tried to do a few things in the past to get students excited about Pi Day (3/14), but it's not been easy to do by myself. It is a LOT of work. Luckily, our new department chair is spreading the wealth this year and asking each member of our department to be in charge of an idea. We met last week to go through a few of the ideas I found on the web. (To get this flyer, email me here because it is not transforming well to an online doc.)
I thought this link from Education World was fantastic and had a lot of great ideas. Mainly, here's the plan:
1. Pi-Dye: Have students bring in old white T-shirts and decorate with pi symbols and as many of the digits of pi as they want to. Then, we tie-dye them like this...I saw this on twitter...where? Please let me know so I can give you credit. We would use this method.
Here is the shirt our student designed. We got 50 T-shirts donated. Can't wait to pi-dye them with the students who signed up via google forms for two afternoons next week!
2. Pi(e) a Teacher: This is a contest we have done for a few years now. The student who memorizes the most digits of pi gets to pie a teacher. Teachers actually volunteer for this :) I recommend having graph paper (listing the digits in each square) where students can write down the digits rather than recite, because if they make a mistake or if you mishear, they will need to do it again...and if they are in a flow and are really competitive...let's just say have them write it down!
3. No-Hands Pie Eating Contest: Volunteer students will do this during each lunch period.
4. Guess the first positive integer no one else has guessed: I feel like I JUST read this on my blog feed and I looked and can't find it. This is harder than it looks! Mu Alpha Theta donated 3 TI-84 calculators and I have been using one to give as a prize each year. We will give that prize in this contest.
5. Pi Bake-off: Perhaps my favorite. Students bake pi-themed desserts. Winners get either $31.41 or $3.14 giftcards to the bookstore.
6. Puzzle Competition: I blogged about this here, too. Click this link for a fun 61-question activity to give to students. We did this one year as an advisory competition.
7. Pi Day Challenge: This online challenge is FANTASTIC!! Go here: http://www.pidaychallenge.com/hello/ It has a series of tough puzzles with no questions...you have to use logic to solve them. This is challenging but addicting!! And it is so great to play in class.
Each riddle provides a great story line that hooks the students. The animation is fun and the voice is great. Each one tells a tale that is seemingly impossible to solve, and then you can pause the video so that the students can attempt to find a solution.
Today, my students were at first very stumped (as was I!) with the Temple Riddle. We worked on it for at least 15 minutes, everyone coming up with different ideas and several students coming to the board. A student finally came up with the solution, but another student wasn't sold. What's great is that when you unpause the video, it explains the solution fully, so that anyone who was confused will no longer be. They are all awesome, and this one is the type of problem that my students crave.
Here are the five of them all in one place if you would like to share them with your students. I recommend spacing them out so that they look forward to them--because they will. More are being made, so stay tuned!
I usually do this myself, asking for a volunteer to hold the string ends at the two foci while I draw the ellipse with a marker. Once I even (gasp) only showed a video depicting this. But now that we have block scheduling, the kids need to get up and move. Often. And so I gave the task to them in pairs to draw the perfect ellipse...and it came out beautifully.
Here is the task:
Student 1 is to draw two points on the board that are on an imaginary horizontal axis. I introduce these as "the foci."
Student 2 is to take the marker and pull the string taught. They are then to go all the way around and draw an oval, which is to be the perfect ellipse. See the video for the demonstration.
It was a bit like twister, which was really fun. But the beauty of it is that kids began to understand, without even talking about ellipses and their equations, why the major axis of an ellipse must contain its foci.
They get the definition of an ellipse, that the sum of the distances from the foci to any point on the ellipse, is a constant. And, that this distance is 2a*
Even better, some could not draw the ellipse because the points were too close together and their taught string would go off the board. So placement of foci was starting to have meaning.
But what was really cool was when students spoke about eccentricity without knowing what it was. The farther apart the two foci, the narrower the ellipse. The closer they were, the closer the shape was to a circle. (see last picture)
*This is a nice way to show how the string length = 2a...there is overlap from the foci to the left vertex. That part was missing on the right. You can also hold the string from one end to the other.
Demonstration of how the location of the foci affects the ellipse...discovered by students and untouched for picture.
I don't know if it made a difference with the students, but I think it did. I think they dug a little deeper. And that, I dig.
Looking for an algorithm for how to solve the Rubik's Cube? It's here. However, it's not a "quick learn." But it's a gritty learn. You will need the tenacity to do it all, but you got this! If I can do it, I promise you, you can too. My suggestion: do it in parts, and practice that part over and over again until it becomes ingrained in you. Then move on to the next part.
These directions have been tested out by students...good luck! I hope they work well for you! And if you have any suggestions or struggles, please email me at lisa.winer@saintandrews.net and I will try to get back to you in a timely fashion!
I have blogged about how I used the Rubik's Cube in my problem-solving class here and created a mosaic here. I have gotten great help from http://www.youcandothecube.com/cube-mosaics/ and Dan Van der Vieren, and the video also displayed at the bottom of the page (not mine). My work is a combination of the video and Dan's help. This is NOT to help you solve the Rubik's cube super fast, but it is a way for you to solve it in anywhere around 3 minutes. Any suggestions are welcome. Here is a direct link to download the directions, but I also made it visual below, page by page. Any changes will be on the direct link, though, since the pictures are static. Do you have the grit it takes to solve it? If you made it this far, then of course you do! Good luck!
-------------------------------------------------------------------------------------------------------------------------How to solve the Rubik’s Cube!!
Top Layer
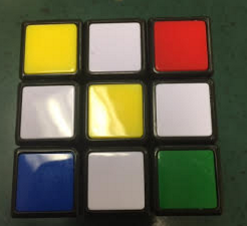
Start with the yellow center and form a white cross around it
Rotate so that middle of a side cube matches the color coming off of a white cube
Rotate that face 180o so that the white part of the cross is now touching the white center.
Repeat steps two and three until you have the white cross with a white center. Note that all of the sides have center cubes that match the white cross outer color.
Play around to get the white corners in the right spot. The 4 white corners that you need to get in the right spot must be in the bottom row. You are in a good spot if the white cube is directly under the spot where you want it on the top layer (facing you.) Turn the bottom row twice in either direction to move the corner out of the way, turn the right side down, move the bottom twice in the opposite direction to get the white corner in place, and turn the right side up. If instead, the white corner was facing the right side and not you, turn the bottom once counterclockwise, turn the left side down, bring the bottom back clockwise, and turn the left side back up. Finally, if the white part of a corner cube is facing the bottom, you need to get it so that it is on the bottom row rather than the bottom itself. To do this, turn the left or right side down (where ever the corner misoriented), twist the bottom clockwise twice to move it out of the way, and then turn the left or right side (whichever you moved first) back up. Now the white face should be in the bottom row, and you can repeat the steps from the beginning of step 5.
Second Layer
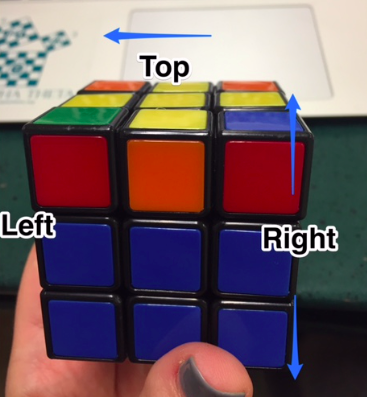
Turn cube upside down and hold the cube so that you have a left side, a right side, and a top.
Find a cube in the left or right face (top middle) that needs to be moved to the middle layer of the corner column. You may need to rotate the top so that the color lines up with the middle cube.
In my case, I am moving the top middle cube to the right. So you will use this sequence: TRtrtlTL, where capital letters rotate clockwise and lowercase letters rotate counterclockwise.
If instead, you want the top middle cube to move to the left, you use tlTLTRtr
In some cases, you will not have a cube to move from the top, but will have to “pop out” one that is in the wrong place. Just repeat one of the sequences above to move a cube into the spot and then the one in the wrong spot will be out.
Keep repeating this by turning the cube and ensuring all of the top middles are moved…you will know this is accomplished when the bottom two layers are complete or when all of the top middles have a yellow in them.
Keep the cube upside down.
You can memorize the sequence by noting that the 3rd and 4th moves undo the 1st and 2nd, and same for the 7th and 8th undoing the 5th and 6th. Doing this over and over again will result in your brain “knowing what to do.”
Third Layer (4 stages)
Stage one: Getting the yellow cross on top. If you already have this, skip stage 1.
There are several possibilities that you can have. Do this move until you get the yellow cross, but be careful to hold it the correct way: LRTrtl
-a middle yellow and no other yellow touching it (hold any way)
-a yellow V, which you must hold the way I am (left side is to the left, right side is to the right)
-a row including the middle (it doesn’t matter if there are more yellows in the corner). You must hold it the way I am. (Same as above)
-a yellow cross, which is the ending position…it doesn’t matter if there are yellow corners or not.
Stage two: Houses
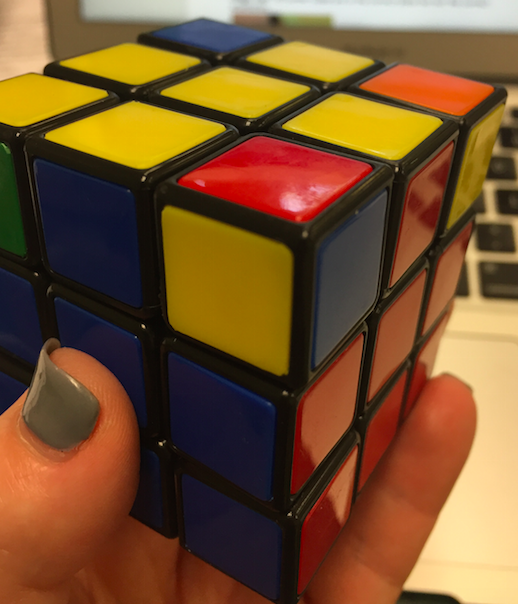
This is a house.
You can have a house in two ways…across from each other or adjacent. The goal is to get 4 houses, so if you already have 4 houses, skip stage 2.
-You must have one house on the right, like below. You can twist the top layer to ensure you find your two houses.
-From here on out, you will have the cube face you (not its corner). THIS IS A NEW WAY TO HOLD THE CUBE...we no longer talk about counterclockwise and clockwise. Hold it like this:
Stage three:
Goal: to get corners in the right spot (not necessarily the correct orientation). (Sometimes this step can be skipped if all corner cubes are in the correct place but not the correct orientation)
The picture below has a corner NOT in the right spot.
-To start, the top right corner has to have the correct cube; it can be incorrect or correct orientation. (IF YOU DON’T HAVE A CORRECT CUBE: If none are in the right place, proceed with the algorithm below, and then after the first time, one should be in the right place.)
Stage four:
All corner cubes are in the correct place but not the correct orientation. For example, the corner shown is in the correct place (corner of red and blue and yellow), but it is not oriented right. This stage will put all the corners in their proper location, just not necessarily oriented.
-Start with a cube that has an incorrect orientation and face that side toward you.
-The mantra is “Down, Left, Up, Right” meaning Right side down, bottom turn left, Right side up, bottom turn right. Do this until the cube on top is in place. Usually takes 4 times.
-The top corner should be in the correct place now and may look like this:
It’s OK that the white cubes are where they are! Just be sure to have finished the mantra (meaning, don’t forget to do the “over” after the corner cube is in place.)
-Now rotate the top over until a new corner cube is in the old corner place…this will likely be over a white color cube. Here is my new cube over the two white cubes from before.
-Repeat “Down, Right, Up, Over” two to four times, and the upper right corner should be in correct orientation now.
-Rotate the top over again until the new corner cube that is not the correct orientation is in the same right corner spot again, and repeat until you solved the cube!


